
Level 457
HARDHow to solve Sand Loop level 457? Get instant solution for Sand Loop 457 with our step by step solution & video walkthrough. Sand Loop 457 tips and guide.
Play Sand Loop Now
Experience the puzzle challenge firsthand
Game Screenshots
Sand Loop Level Guides
Sand Loop Level 457: The Flower Bouquet - Strategy & Walkthrough
Level Overview: A Pixel-Perfect Puzzle
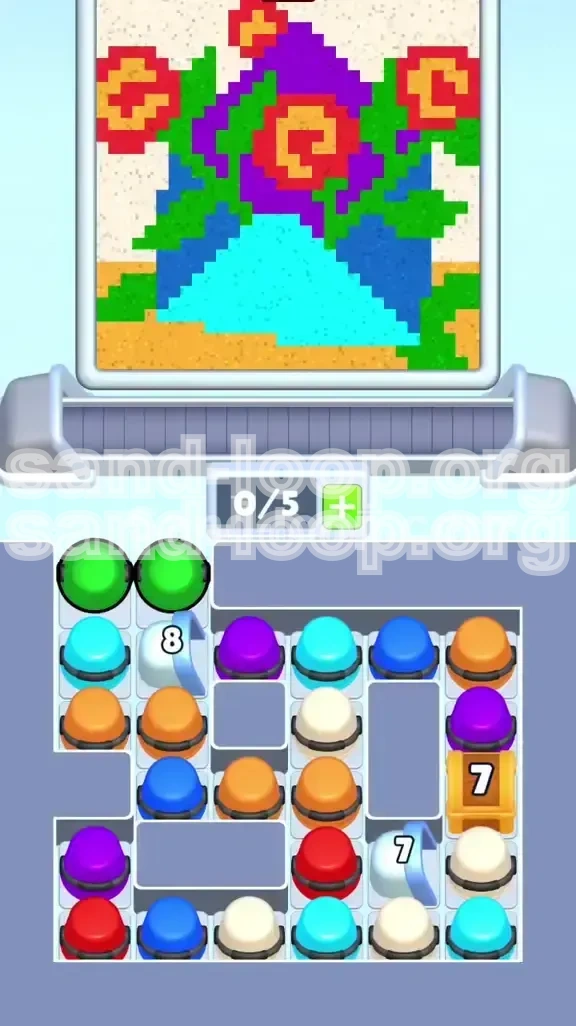
Welcome to the definitive guide for Sand Loop Level 457, widely known by players as "The Flower Bouquet." This stage is a deceptive challenge that masquerades as a simple artistic task but functions as a rigorous test of resource management. The visual composition—a beautiful arrangement of red flowers, lush green foliage, and a cyan triangular vase—is intricate, requiring precise pixel placement. However, the true difficulty lies in the Supply Tray mechanics. Unlike previous levels where you might rely on speed, Level 457 is a logic-gated challenge. If you attempt to rush the conveyor belt without a plan, you will face a deadlock within seconds. This guide will dismantle the level's complex dependency chains, ensuring you manage the Ice Blocks and Golden Chests efficiently to secure that 100% completion rating.
Primary Objectives and Victory Conditions
To successfully clear Level 457, you must move beyond simple color matching and focus on unlocking your supply lines. Your goals are:
- Unlock Critical Resources: Immediately prioritize breaking the Ice Block (8) on the left and the Golden Chest (7) on the right. These are blocking your primary tools (Green and White cups).
- Manage Capacity: Keep your slot usage flexible. Never fill your 5 available slots blindly; always keep at least 1 or 2 slots open for emergency cups.
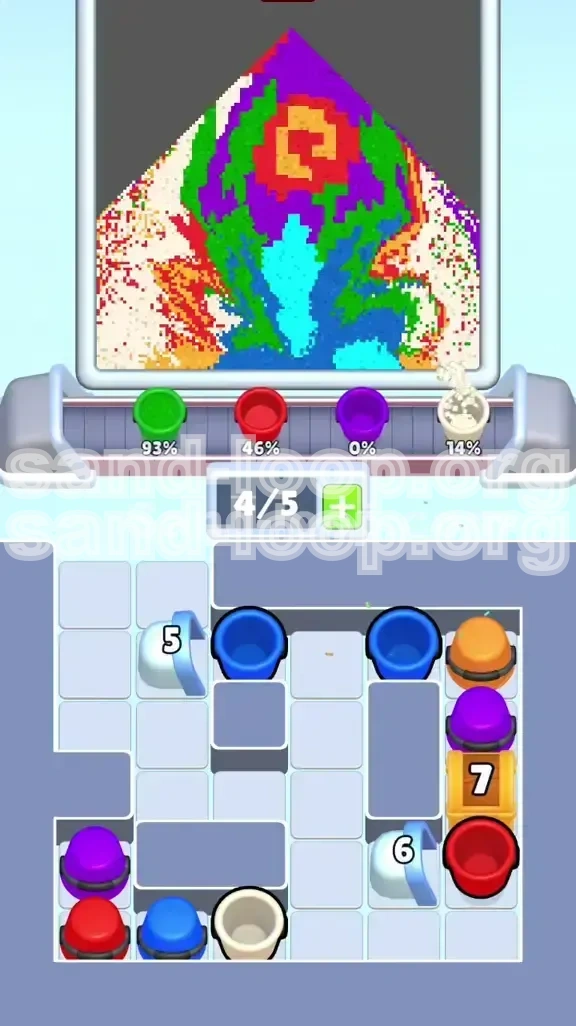
- Accuracy Over Speed: Achieve a fill rate of over 95% on the background and foliage without "bleeding" colors into the wrong zones.
- Execute the Color Order: Follow a strict sequence of filling the background first, stems second, and flower details last to prevent contamination.
Deconstructing the Color Palette and Canvas
High-Volume Colors: Green and Purple
Before you tap a single cup, understand where your bulk sand will go. The Royal Purple and Forest Green zones consume approximately 60% of the total sand volume in this level. The purple creates the shadowed background, giving the bouquet depth, while the green forms the stems and extensive leaf network. Crucially, the Green Cups are locked behind the Ice Block at the start. If you waste your initial white or blue sand trying to chip away at the wrong blocks, you will run out of green sand halfway through the stems. Recognizing that these are your "fuel" colors is the first step to victory.
Low-Volume, High-Risk Colors: Yellow and Red
The Yellow centers of the flowers are the biggest trap in Level 457. These areas are pixel-small and require precise, short bursts of sand. A common failure point is "over-pouring"—where the player holds the tap too long, causing yellow sand to bleed into the surrounding red petals. This turns your beautiful flower into a muddy orange mess and ruins your percentage. Similarly, Red is high volume but spatially complex, hugging the green stems tightly. You must leave red for the mid-game, once the green outlines are perfectly defined.
The Structural Base: Cyan and White
The Cyan triangular vase acts as the anchor for the image. It is a large, contiguous area that is easy to fill but requires a steady stream of cups. Since Cyan is rarely blocked, it serves as a good "dump" for excess capacity. The Off-White background is your primary workhorse for breaking obstacles. Since white covers the largest area of the canvas, the White Cups are your most valuable asset. They are initially trapped under the Golden Chest. You must free them early; otherwise, you will find yourself with a full tray of unusable colors while the background remains empty.
The Floor and Texture: Tan/Orange
Don't neglect the Tan/Orange sections at the bottom corners. While they seem minor, they often connect the foliage to the floor edge. If you leave these for the very end, you might find you've already run out of orange sand or that your tray is clogged with colors you no longer need. Treat the floor as a secondary priority to be filled while you are waiting for your Green or Red cups to cycle in.
Step-by-Step Walkthrough: The Opening Phase
Immediate Action: The Ice Block Strategy
As soon as the level loads, your eyes must go to the Ice Block (8) on the far left of the Supply Tray. This is your number one priority. Do not worry about filling the canvas yet. Tap the White and Blue cups that are immediately available. Direct them immediately into the Ice Block. You need 8 hits to shatter it.
Pro Tip: Don't wait for the cups to travel all the way to the pour point if you can queue them up. However, ensure you don't overload the conveyor. Once this block shatters, two Green Cups will slide down. This is the turning point of the level.
Symmetric Operations: Cracking the Golden Chest
While you are hammering the Ice Block, you must keep an eye on the right side. The Golden Chest (7) is guarding a column containing vital White and Purple cups. Use any available Orange or spare Purple cups to chip away at this. You need 7 hits.
Warning: If you focus solely on the left Ice Block, the right side will stagnate. You need a rhythm: Tap for the Ice Block, Tap for the Chest, Tap for Ice Block. Keeping both blockers degrading at a similar rate ensures that when the mid-game starts, you have a balanced tray of Green, White, and Purple cups.
Managing the Early Conveyor
In the first 30 seconds, the game will try to trick you with "Red" or "Yellow" cups. Ignore them unless you have empty slots and the dispenser matches. The Red sand is useless until the Green stems are in place. If you fill your tray with Red now, you will have no space for the Green cups when the Ice Block breaks. Be ruthless about sending unwanted cups to the "void" or holding off on tapping them.
The "Slot Capacity" Danger Zone
Monitor your 5-slot capacity constantly. If you hit 4/5 full, stop tapping. Wait. Let a cup travel to the canvas and free up a slot. If you fill the 5th slot with a random color while waiting for a Green cup to spawn, you create a "soft lock." You will be forced to use that unwanted color, wasting time and sand. Patience in the first minute saves you from a restart in the third minute.
Mid-Game Strategy: Establishing the Foliage
The Green Foundation
Once the Ice Block shatters and the Green Cups are in play, the strategy shifts to filling the stems and leaves. This is the Green Phase. Green sand has the highest volume requirement. Pour continuously to map out the stems. Why do this first? The stems act as the borders for the Red petals later. If you try to fill the red petals before the green stems, you will inevitably spill red sand into the background areas, creating a mess that is impossible to clean up without wasting white sand.
Defining Edges with the Royal Purple
While Green is your primary focus, use Royal Purple to fill the shadow areas behind the flowers. Filling the purple background first creates a high-contrast border. It effectively "cuts out" the shape of the bouquet, making it visually easier to aim your Red and Yellow sand later. Think of the Purple as the walls of your coloring book. Keep the Purple cups moving whenever the Green dispenser is cycling or reloading.
Handling the "Panic Cup" Scenario
In the mid-game, you will encounter moments where the dispenser switches to a color you didn't plan for (e.g., Yellow when you need Green). If your tray is full (4/5 or 5/5), you enter a panic state. Do not jam a random cup onto the belt. Instead, look at the canvas. Is there a small spot for that color? If yes, tap it. If no, you must wait for a cup to clear the belt. Adding the wrong cup now guarantees a bottleneck later.
Timing the Dispenser Switch
The Sand Loop dispenser has a rhythmic cycle. Learn the "Lead Time." If the dispenser arm is moving towards the center, tap your cup slightly before it arrives. Because it takes roughly 1.5 seconds for a cup to travel from the tray to the pour point, you must predict the future position of the dispenser. If you tap when the arm is over the target, you might miss the window as the arm moves away. Lead your target.
Endgame Tactics: Precision Filling and Cleanup
Inserting the Red Petals
With the Green stems and Purple background complete (around 70-75% total fill), you can finally unleash the Red sand. Now that the borders are defined, you can pour aggressively into the petal zones without fear of spillage. The Red cups usually become abundant in the late game. This is your time to bulk up that percentage. Don't worry about precision here as much as volume; the Green stems you placed earlier will catch any overflows.
The Yellow Center Precision Test
This is the final boss of Level 457. The Yellow centers. You must switch your brain from "bulk filling" to "micro-tapping." Do not hold down the tap. Tap, release, check. Tap, release, check. You are looking for micro-bursts of sand. A single over-pour can turn a 98% run into a failed run. If you see the yellow sand touching the red petals, stop immediately. You can often fix a shortage of yellow, but it is nearly impossible to fix yellow contamination without restarting.
The Cyan Vase Finale
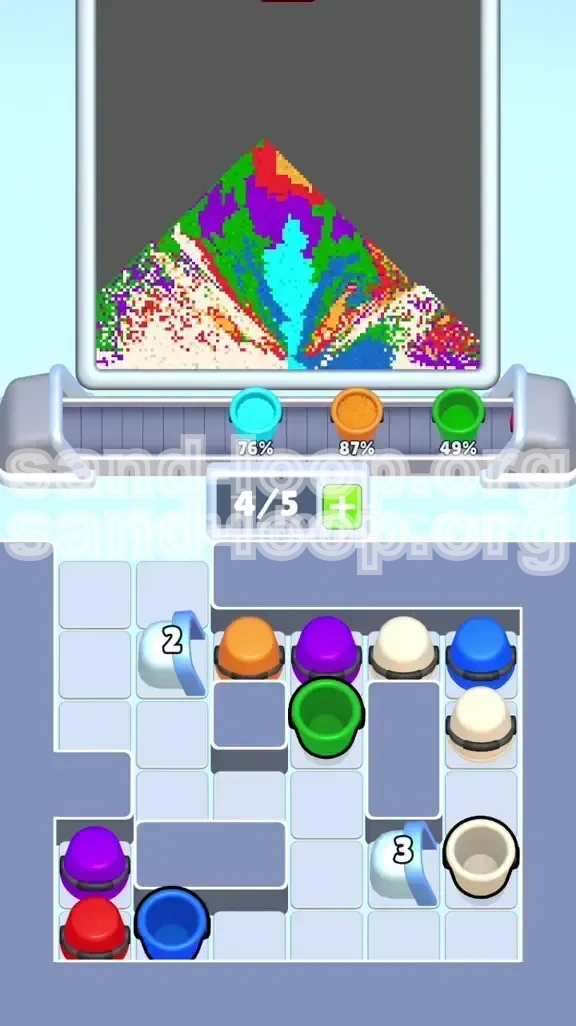
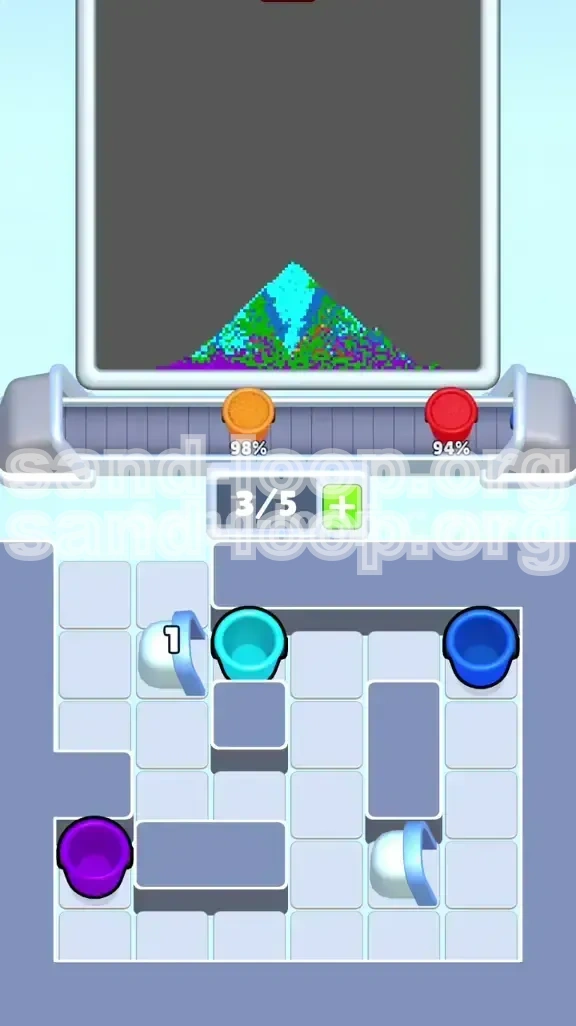
The Cyan vase is often left for the endgame because Cyan cups tend to be buried deeper in the tray or spawn less frequently in the initial waves. Once the flowers are done, the canvas looks mostly full, but you'll notice the big empty triangle at the bottom. Clear your tray of any remaining debris and focus entirely on cycling Cyan cups. It's a large area, so it fills quickly, giving you a satisfying jump from 90% to 98%.
Final Polish: Corner Cleanup
The last 2% of Level 457 is frustrating. It usually consists of isolated white pixels in the top corners or tiny gaps between the leaves. Use the White Cups you liberated from the Golden Chest at the start. Since White is the background color, it is very forgiving. You can pour white almost anywhere there isn't a flower to fix those lingering background gaps.
Mastering Level 457: Advanced Tips and Common Mistakes
Common Mistake: The Early Speed Run
The vast majority of failed attempts on Level 457 happen in the first 45 seconds due to "spam tapping." Players see the colors and instinctively try to fill the conveyor. This leads to a tray full of Red cups while the Green cups are still locked behind Ice. The Fix: Accept that the first minute is slow. It is an excavation mission, not a painting mission. If you aren't breaking blocks, you aren't progressing.
Advanced Tip: Queue Management
Look at the cups "queued up" behind the active dispenser. If you see that the dispenser is currently Red but the next two in line are Green, do not tap a Green cup immediately if your belt is full. Instead, use a Red cup to clear a slot, so that when the Green dispenser arrives, you have an open slot ready to accept the Green cup. This "Queue Reading" is what separates 3-star players from the rest.
What To Do When Stuck
If you find yourself stuck at 85% with no Green or White cups available, you have likely managed your tray poorly. The Solution: Look at the bottom of the Supply Tray. Are there usable cups buried under the "top layer"? You need to use the cups on your belt to force the tray to cycle. Even if it means pouring a little bit of unwanted color into a "safe" zone (like an already full area), you must cycle the tray to bring the buried cups to the top.
Speed Run Suggestions
For those looking to optimize their time for a 3-star score: Memorize the Ice Block HP. It takes exactly 8 hits. Have a rhythm ready: TAP-TAP-TAP-Pause-TAP. Don't wait for the visual "crack" animation to finish before tapping the next cup. You can queue the inputs. Furthermore, practice the "Yellow Micro-bursts." If you can master the yellow fill without stopping to check, you can shave precious seconds off your final time.