
Level 471
HARDHow to solve Sand Loop level 471? Get instant solution for Sand Loop 471 with our step by step solution & video walkthrough. Sand Loop 471 tips and guide.
Play Sand Loop Now
Experience the puzzle challenge firsthand
Game Screenshots
Sand Loop Level Guides
Level Overview: The 5-Slot Logistics Puzzle
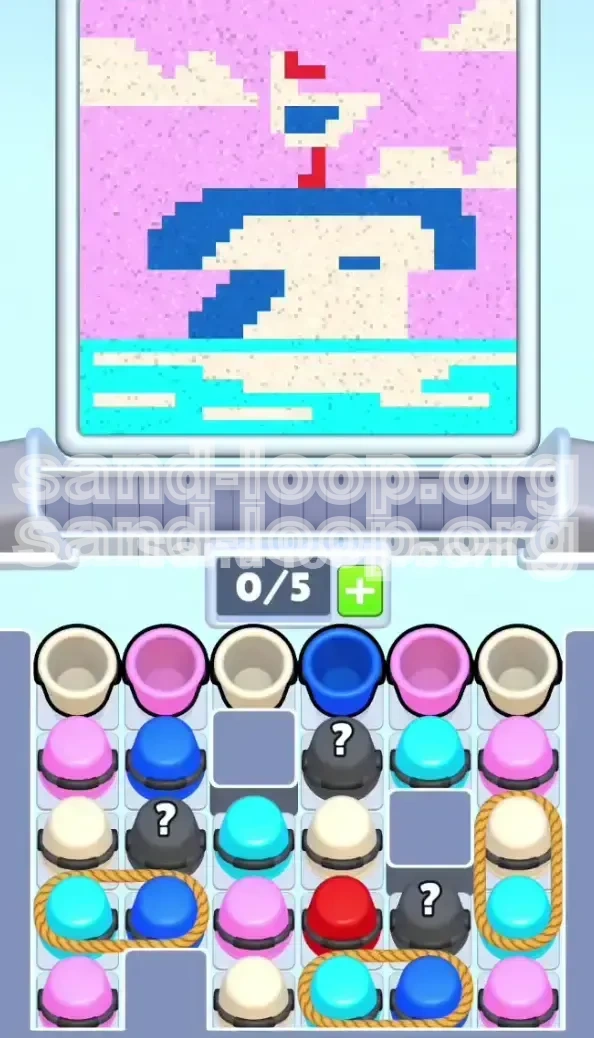
Welcome to Level 471, arguably one of the most restrictive inventory management stages in the game. While the artwork depicts a peaceful "Sunset Sailboat," the gameplay is anything but calm. This level is defined by a single, crushing constraint: your conveyor belt capacity is capped at a maximum of 5 slots. In a game environment where standard levels usually allow for 7 to 9 slots of buffer space, this reduction creates a claustrophobic experience where a single tap of the wrong cup results in an immediate deadlock.
The difficulty spike here comes from the combination of this limited inventory and the board's structure. The level is littered with "Roped Pairs"—mechanics that force two cups onto your belt simultaneously—and "Mystery Cups" that introduce random variables. When your belt is 80% full (4/5 slots), cutting a single rope adds two more cups, instantly overflowing your system. Consequently, this level shifts the genre from a casual puzzle game to a precision logic test. You are not painting; you are managing a tightly controlled supply chain where the margin for error is effectively zero.
Visual Analysis: The Canvas Zones
To succeed, you must deconstruct the image into distinct color zones. The canvas is divided vertically into four primary areas. First, the Pale Pink Sky dominates the upper 40% of the screen. This is your largest color sink. Second, the Cyan Water occupies the bottom 30%, acting as the final stage of the painting process. Third, White is used intermittently for clouds, the boat sail, and water reflections, comprising about 20% of the visual weight. Finally, Dark Blue and Bright Red are accent colors, used sparingly for the boat hull and a small flag, respectively. Understanding this ratio is critical: you must prioritize the high-volume colors (Pink and Cyan) first to prevent inventory bottlenecks.
The Critical Inventory Constraint
The 0/5 to 5/5 slot limit is the primary antagonist of this level. In most puzzles, you can afford to let a "useless" cup sit on the belt while you wait for the correct color to appear. Here, letting a cup sit is a death sentence. For example, if you are pouring Pink (Sky) and you accidentally pull a Cyan (Water) cup, that Cyan cup sits on the belt. Since you won't need Cyan for another 10 minutes, that slot is effectively dead. With only 5 slots available, hoarding two or three "future" colors will leave you with no space to maneuver when the current colors run out. You must adopt a "Just-in-Time" management style, pulling cups only when the canvas is immediately ready to receive them.
The Roped Pair Hazard
The level utilizes "Color-Mismatched Ropes" to punish impulsive players. You will frequently see Cyan cups tied to Dark Blue, or White tied to Pink. The physics of the game dictate that tapping one cup drags its partner onto the belt immediately. If you cut a rope holding Cyan and Dark Blue while you are still painting the Pink Sky, you have now filled two valuable slots with colors you cannot use. This creates a "soft lock" where you must wait for the Sky to finish before you can clear the belt, but you can't fetch more Pink because the belt is clogged with Blue. The golden rule is: never cut a rope unless you have the capacity to process *at least one* of the two colors instantly.
The Mystery Cup Variable
Access to the lower section of the board is blocked by three large Mystery Cups (marked with "?"). These function as randomized gates. While they often contain useful colors, they carry a high risk in a 5-slot environment. If you tap a Mystery Cup when your belt is at 3/5 capacity, you might pull a color that doesn't match the current canvas sector. More dangerously, the Mystery Cups physically shield the Red Cup required for the flag. You cannot finish the level without breaking them, but breaking them prematurely can flood your belt with random junk. The strategy requires timing these breaks to coincide with moments when your belt is completely empty (0/5), ensuring you have maximum flexibility to handle whatever color pops out.
Clear Objectives: Your Roadmap to Victory
To navigate Level 471 without failing, you need a rigid, phased approach. Do not rely on intuition. Your primary goal is to maintain "Flow State"—a condition where the conveyor belt never reaches maximum capacity and the active pouring color always matches the largest available unpainted area on the canvas.
Objective 1: The Sky Clearance (Top Row)
Your immediate priority is to clear the "safe" zone. The top row of the supply tray consists of loose, un-tethered Pink and White cups. These are your only source of risk-free inventory. You must aggressively mine these cups first to paint the sky. The objective here is not just to paint, but to physically remove these cups from the tray to clear the line of sight to the dangerous Roped Pairs and Mystery Cups below. If you leave the top row cluttered, you risk mis-tapping and accidentally triggering a lower rope.
Objective 2: The Mystery Gate Breach
Once the sky is roughly 50% complete, you must address the Mystery Cups blocking the center of the board. You cannot ignore them, as they guard the Red cup and access to the lower ropes. The objective is "controlled exposure." You must wait for a specific "Lull"—a moment when your belt is empty or near-empty—to break these. You are not breaking them to get the color inside; you are breaking them to clear the physical obstruction. If you get a lucky Red pull, great. If you get a useless color, you need enough belt space to hold it until you can dispose of it.
Objective 3: Hull Preparation (Dark Blue)
Before you can tackle the massive amount of Cyan water, you must prepare the canvas to accept Dark Blue. Most of the Cyan cups are tied to Dark Blue cups via ropes. If you paint the water first, you will be left with useless Dark Blue cups clogging your belt at the very end of the level. Therefore, you must paint the boat hull (Dark Blue) *before* you start pulling the heavy Cyan pairs. This ensures that when you cut the ropes, the Dark Blue half of the pair can be poured immediately, freeing up the slot for the Cyan water.
Objective 4: The Water Flood (Endgame)
The final 20% of the level is a race to fill the bottom of the screen with Cyan. This is the most dangerous phase. You will be cutting multiple ropes in rapid succession. The objective is synchronization: you must tap the ropes exactly when the canvas transitions from the Hull/Sail to the Water section. If you tap too early, the belt jams. If you tap too late, you run out of moves. The goal is to keep the belt at a steady 3/5 to 4/5 capacity, pouring Cyan constantly until the level completes.
The Color Priority Order
The order of operations is non-negotiable in Level 471. Processing colors out of sequence is the most common cause of failure. We follow a "Top-Down, Large-to-Small" logic that aligns with the physical layout of the sailboat image.
Priority 1: Pale Pink (The Sky)
Pink is your primary fuel. It covers the vast majority of the top half of the screen. By prioritizing Pink, you utilize the loose cups in the top row, which are safe to pull. Furthermore, Pink takes a long time to pour due to the volume required. Getting Pink onto the belt and pouring early frees up your mental bandwidth to focus on the complex rope mechanics later. Never leave Pink for the end; if your belt is clogged with end-game colors and you still have 20% of the sky unpainted, you will lose.
Priority 2: White (Clouds & Sail)
White serves two functions: it breaks up the Pink sky (clouds) and establishes the focal point (sail). White cups are abundant in the top row. You should process White immediately after starting Pink, or alternate strictly between Pink and White. Because the sail is a large vertical block, pouring White early helps define the center of the image. Crucially, clearing the White cups from the top row reduces visual clutter, making it easier to identify the Roped Pairs hidden beneath.
Priority 3: Dark Blue (The Hull)
Dark Blue is a "Key" color. It is not used for large areas, but it is mechanically linked to the Cyan cups. You must paint the hull *before* the water. If you paint the water first, the Dark Blue cups (which are tied to Cyan) will become "dead weight" on your belt—cups you can't pour and can't get rid of. By painting the hull third, you ensure that every time you pull a Blue/Cyan pair, the Blue component is immediately useful.
Priority 4: Cyan (The Ocean)
Cyan is the "Finish Line" color. It fills the bottom of the screen. You must resist the urge to pull Cyan early, even if you see it. The Cyan cups are trapped in ropes at the bottom of the tray. Pulling them before the Sky and Hull are done is a guaranteed way to fill your belt with un-pourable inventory. You wait until the canvas is ready for the ocean, then you batch-process all Cyan cups in rapid succession.
Priority 5: Bright Red (The Flag)
Red is the wildcard. It is a singleton cup buried deep behind the Mystery Cups. Ideally, you pull it when the Mystery Cups are broken. Since the flag is tiny, the Red cup pours almost instantly. You can pour Red at almost any time once it is exposed, provided you have one empty slot. It is often best used as a "palette cleanser"—if you have a mix of colors on the belt and need to free up a slot quickly, pour the Red.
Step-by-Step Walkthrough Instructions
Follow this exact sequence to navigate the level safely. Do not deviate from the order unless you are an experienced player looking to optimize.
Phase 1: The Sky & Clouds Sequence
- Step 1: Start the level. Do not touch anything on the bottom half of the screen.
- Step 2: Locate the top row of loose Pink and White cups.
- Step 3: Tap a White cup first. Send it to the belt.
- Step 4: Immediately tap a Pink cup next to it.
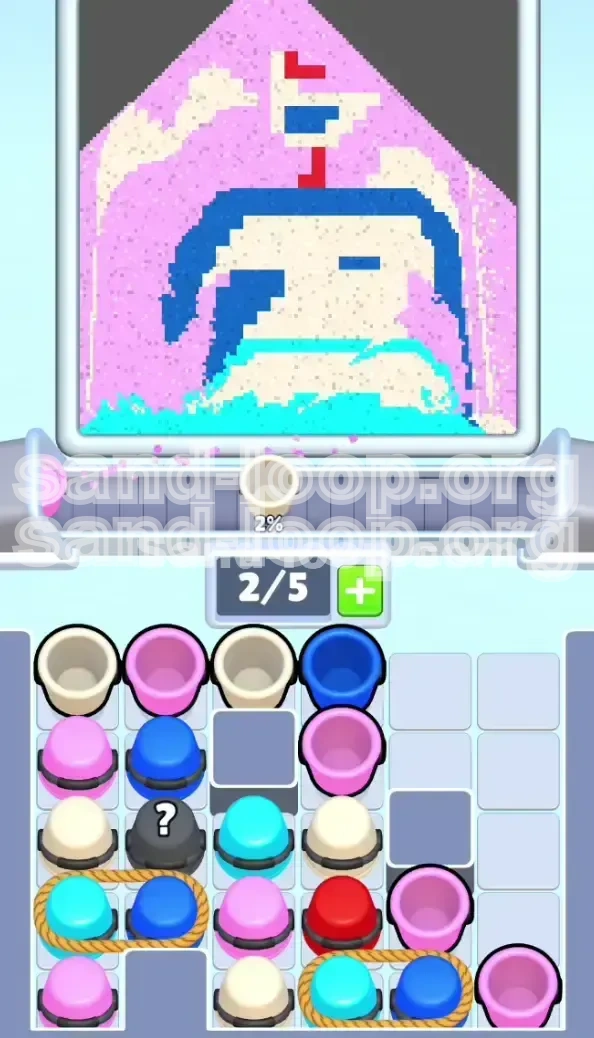
- Step 5: Maintain a rhythm of alternating Pink and White. Watch the belt count. Keep it around 2/5 or 3/5 while these pour.
- Step 6: Continue until the top row is cleared and the sky is roughly 50% filled.
- Step 7: Do not touch the Dark Blue cup in the top right yet if it's roped to something below.
Phase 2: The Mystery Cup Breach
- Step 1: Stop tapping. Wait for the belt to empty completely (0/5).
- Step 2: Identify the three gray Mystery Cups in the center.
- Step 3: Tap the Left-Most Mystery Cup.
- Step 4: Observe the color:
- If Red: Pour it immediately on the flag to clear the slot.
- If White/Pink: Pour it immediately on the clouds/sky.
- If Blue/Cyan: Let it sit on the belt. Do not force it.
- Step 5: Wait for the belt to clear again.
- Step 6: Tap the Center Mystery Cup. Repeat the assessment logic.
- Step 7: Wait for the belt to clear.
- Step 8: Tap the Right Mystery Cup.
- Step 9: By the end of this phase, the Red Cup should be exposed, and the path to the lower ropes is clear.
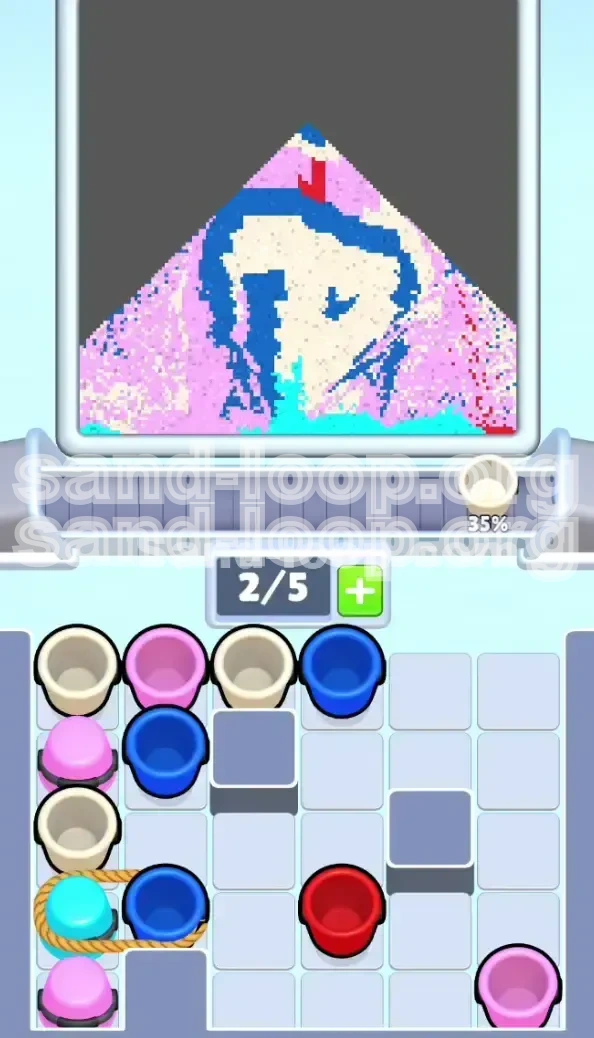
Phase 3: Hull & Rope Management
- Step 1: Assess the canvas. The Sky should be mostly done. The Sail (White) should be done.
- Step 2: Locate the Dark Blue/White roped pair (usually on the right).
- Step 3: Ensure you have 2 empty slots on your belt.
- Step 4: Cut the rope (tap the pair).
- Step 5: Both cups will load. Pour the Dark Blue immediately onto the boat hull.
- Step 6: The White cup will likely remain on the belt. This is fine; use it for any remaining cloud/sail details.
- Step 7: If the Red Cup is still waiting, pour it now to free up a slot.
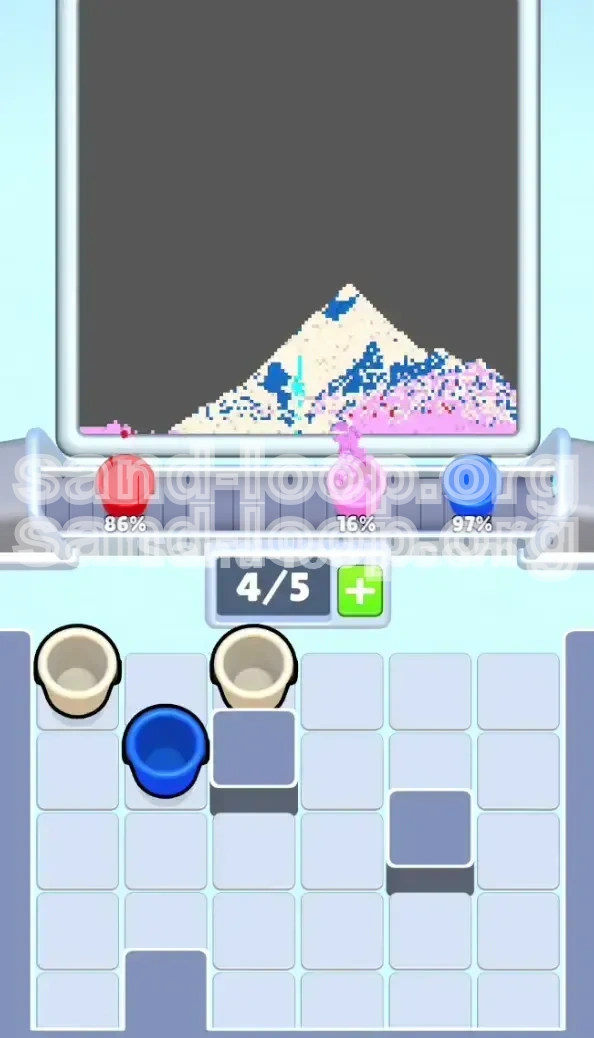
Phase 4: The Cyan Water Finish
- Step 1: The canvas is now ready for the water. The Hull is Blue; the Sky is Pink.
- Step 2: Locate the Cyan/Dark Blue roped pairs at the bottom.
- Step 3: Check your belt. Ensure you have space for the "unwanted" color if the Hull is already finished.
- Step 4: Cut the first Cyan rope. Pour the Cyan immediately.
- Step 5: If a Dark Blue cup appears and the Hull is already done, it must sit on the belt. You must work around it.
- Step 6: Cut the remaining Cyan ropes. Pour rapidly.
- Step 7: The water level will rise. As it fills, the level completion trigger will activate.
Advanced Tips, Mistakes, and Speed Runs
Mastering the mechanics is one thing; avoiding the psychological traps is another. These sections cover the edge cases and optimization strategies.
Common Mistake: The Premature Rope Cut
The biggest killer in Level 471 is impatience. You see a color you need (Cyan) and you tap it, forgetting it's roped to Blue. If the Hull isn't ready, that Blue cup sits on your belt like a rock. With only 5 slots, having two "rock" cups means you are 40% full of useless inventory. The Fix: Ask yourself: "Is the canvas ready for *both* of these colors?" If the answer is no, do not tap.
Common Mistake: Ignoring Belt Count
Don't play by sight alone; play by numbers. If your belt is 4/5, you are in the red zone. Cutting a rope (adding 2 cups) will mathematically overflow you (4+2=6). The Fix: If you are at 4/5, stop tapping everything. Look at the belt. Wait for a cup to finish. Only when you are at 2/5 or 3/5 should you consider cutting another rope.
Key Tip: The "Pause and Pour" Rhythm
This level requires a slow, rhythmic playstyle. Avoid "double tapping" or rapid clicking. Adopt a "One-Two" rhythm: Tap a cup, watch it land, watch the pour, *then* tap the next. This deliberate pace prevents you from mis-tapping a Mystery Cup or a Rope when your belt is momentarily full. Speed is your enemy here; consistency is your friend.
Stuck Solution: Managing the Deadlock
If you mess up and your belt is full (5/5) with colors that don't match the canvas (e.g., you have Blue and Cyan, but only Sky left to paint), you are in a "Soft Lock." The Solution: You must find *any* pixel on the canvas that matches a cup on your belt. Even if it's a tiny corner you missed, pour it there. If absolutely no area matches, your only hope is to wait and see if the game allows a tiny bit of overflow, or restart the level. Do not waste power-ups on a full belt unless necessary.
Speed Run Tip: The "Pre-Load" Method
For players aiming for a high score or three-star rating, the key is minimizing the "decision time." While pouring a Pink cup, don't watch the sand fall. Use that time to scan the tray for the *next* loose Pink cup. Have your finger hovering over it the millisecond the current cup finishes. For the Mystery Cups, assume they will be White or Pink (the statistical probability is higher). Be ready to pour White immediately so the cup vanishes from the belt instantly.