
Level 470
HARDHow to solve Sand Loop level 470? Get instant solution for Sand Loop 470 with our step by step solution & video walkthrough. Sand Loop 470 tips and guide.
Play Sand Loop Now
Experience the puzzle challenge firsthand
Game Screenshots
Sand Loop Level Guides
Level Overview: The Grazing Cow Puzzle
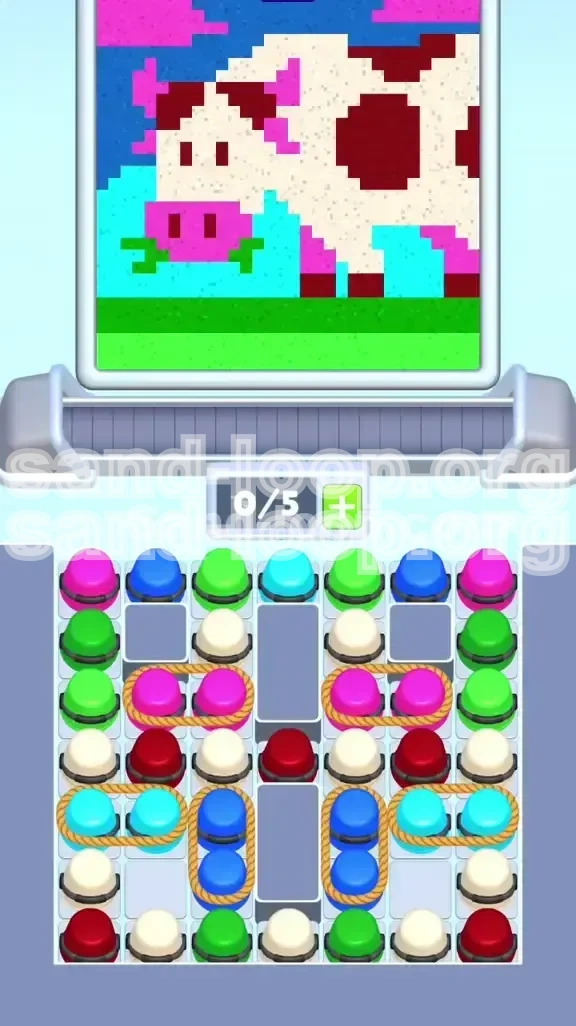
Welcome to the Sand Loop guide for Level 470, "The Grazing Cow." This stage is a significant shift in difficulty, transitioning from simple color matching to a complex exercise in resource management and spatial logic. The goal is to assemble a pixel-art image of a cow in a pasture, but the challenge lies in the severe constraints placed on your inventory.
Unlike standard levels where you can collect resources freely, Level 470 imposes a strict "5-Slot Limit" on your processing belt. This restriction turns the game into a "bottleneck" simulation. You are constantly balancing the intake of new sand against the output of the finished image. The level is visually deceptive; it looks like a relaxing farm scene, but it is actually a rigorous test of your ability to plan ahead.
The 5-Slot Constraint
The most critical mechanic in this level is the conveyor belt limit. You can only have 5 units of sand on your belt at any given time. If you tap a new cup when your belt is full (5/5), you will trigger an overload and fail the level. This limit is aggressively tested by the level's design, which features "Roped Pairs"—two cups tied together that occupy 2 slots instantly. Managing this limited space is the core challenge of the puzzle.
Visual Breakdown of the Canvas
To succeed, you must deconstruct the target image into three distinct zones. The bottom 30% is a large expanse of Green pasture. The central 50% is the White body of the cow, which requires a high volume of sand. The top 20% contains the detailed features: Pink ears and snout, set against a Cyan sky and Dark Blue corners. Understanding this stratification is vital for planning your color intake strategy.
The "Roped Pair" Mechanic
This level introduces a high density of Roped Pairs. These are visually connected by a rope or chain. Tapping one pair adds two units to your belt immediately. This doubles the resource load on your conveyor belt. The danger lies in the fact that these pairs are often sandwiched between single cups. Accidentally tapping a pair when you have 4/5 slots occupied will crash your game. You must learn to identify these pairs instantly before you tap anything.
Resource Economy and Scarcity
Not all sand is created equal in this level. You have an abundance of White sand, which is tempting to collect early, but doing so clogs your limited inventory. Conversely, colors like Pink and Dark Blue are scarce but located in precarious positions. You must balance the high-volume "body" colors against the low-volume "detail" colors. If you treat this as a simple color-matching game, you will fail; you must treat it as a resource management simulation.
Psychological Pressure
The game creates artificial pressure through the visual clutter of the supply tray. With dozens of cups clustered in the center, it is easy to panic and tap randomly. However, the puzzle is static. The cups will not move or change unless you interact with them. Take a deep breath, ignore the noise of the center cluster, and focus entirely on the perimeter to begin your sequence.
Strategic Objectives and Clear Goals
To conquer Level 470, you must move beyond simple color matching and adopt a strategic mindset. Your goal is not just to fill the canvas, but to manage the flow of materials from the supply tray to the canvas without triggering a belt overflow. Here are the specific objectives you must meet to achieve a three-star rating.
Mastering Slot Management
Your most critical metric is the Slot Count on your conveyor belt. You operate with a strict limit of 5/5. A successful run requires you to hover between 2/5 and 4/5 capacity for 90% of the level. Keeping your belt completely empty is inefficient, but keeping it full is fatal. You must learn to "chain" your taps: activating a new cup the exact moment a previous cup finishes dispensing. This keeps your flow constant without exceeding the limit.
Establishing the Fill Order
You cannot simply color wherever you want. You must follow a dependency hierarchy. The Green grass must be laid down first to serve as a foundation. The White body comes second. The details (Pink, Dark Red) come third. The background (Cyan, Dark Blue) comes last. Filling the background early is a waste of slots and risks contaminating the detail zones. Sticking to this order ensures that your high-demand colors are prioritized.
Isolating Roped Pairs
A major objective is to clear the "blocker" cups (singles) that shield the Roped Pairs. You need to create a buffer zone around the center of the supply tray. Your goal is to reach a state where the belt is completely empty (0/5), allowing you to safely pull a Roped Pair without crashing. This requires planning 3 to 4 moves in advance.
Preventing Color Contamination
Because the canvas features small "islands" of color within larger zones (like Green grass inside the Pink snout), you must avoid overfilling. If you pour White sand into the cow body before the adjacent Pink snout is finished, the excess White sand will bleed into the empty snout slot, ruining the pixel art. Your objective is to fill disconnected color zones in a specific sequence to seal off borders before pouring neighboring colors.
Efficiency and Flow
Finally, you must minimize idle time. Watching the sand pour without preparing your next tap is a waste of potential speed. A perfect run feels like a rhythm game: tap, wait, tap, wait. By maintaining a steady rhythm, you naturally regulate your slot usage and avoid the temptation to "hoard" cups on the belt.
Step-by-Step Walkthrough: Phase 1
The first phase of the level is the most critical. It sets the rhythm for the rest of the game and clears the space needed to maneuver the complex center grid. We will focus on the perimeter of the supply tray and the foundational colors of the image.
Step 1: The Green Pasture Initialization
Start by ignoring the center completely. Look at the far left and far right edges of the supply tray. You will see single Green cups. Tap these Green cups first. Send them up the conveyor belt. The bottom of the canvas (the grass) is a large, forgiving area. It acts as a "dump" for your initial resources. Filling this first clears the bottom of the screen and allows you to focus on the cow above it.
Step 2: Securing the White Body
Once the Green cups are on the belt, immediately look for the single White cups located on the outer perimeter. These are the building blocks of the cow. Tap two or three White cups in quick succession. Since the cow's body is the largest feature, it can accept sand rapidly. Do not worry about the spots yet; just fill the main White mass. Keep an eye on your slot count; stop tapping Whites if you hit 4/5 capacity.
Step 3: The Dark Red Spotting
While the White sand is pouring, scan the perimeter for Dark Red singles. These are needed for the cow's spots. You can introduce these while the White cups are still active. Because the spots are small and located *on top* of the white body, they are safe to pour concurrently. Tapping a Dark Red single while a White single is pouring is a great way to maintain 3/5 or 4/5 slot efficiency without causing a backup.
Step 4: Creating the "Safe Zone" Buffer
By now, you should have cleared the left and right columns of the supply tray. This is your "Safe Zone." The center grid is now exposed. Do not tap anything in the center yet. Wait for your belt to clear completely. Let the Green, White, and Dark Red sand finish their journey. You need an empty belt (0/5 slots) to survive the next phase. Patience here is more valuable than speed.
Step 5: Analyzing the Center Grid
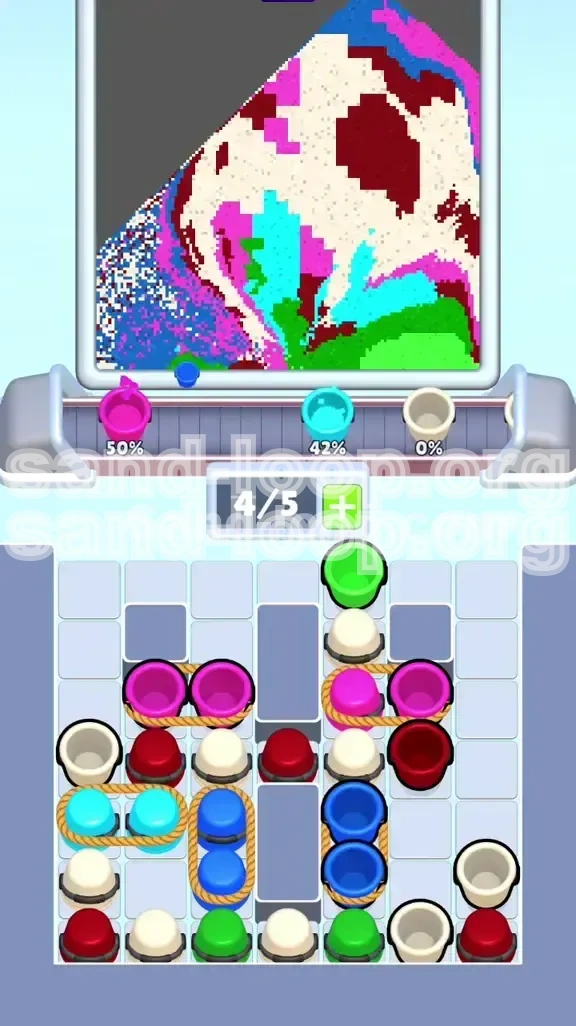
With the perimeter cleared, look at the remaining cups in the center. You will see the Roped Pairs clearly now. You will notice two Pink pairs in the upper middle, Cyan pairs on the sides, and Dark Blue pairs in the bottom center. Memorize their locations. Visualizing this map now prevents accidental taps later.
Step-by-Step Walkthrough: Phase 2
Now that the foundation is laid, we enter the danger zone. The outer defenses are gone, and you must extract the Roped Pairs to finish the detailed features of the cow. This phase requires precise timing and an empty belt.
Step 6: The Pink Snout and Ears Operation
Ensure your belt is 100% empty. Locate the two Pink Roped Pairs at the top center of the tray. These are required for the cow's snout and inner ears. These are small, detailed areas. Tap one Pink pair. They will jump onto the belt, occupying 2/5 slots immediately. Guide them to the canvas. Fill the Pink areas. Because these are small targets, the sand will pour quickly. Do not tap anything else until these Pink cups have finished dispensing.
Step 7: The Dark Blue Sky Corner Execution
After the Pink is done, check the bottom center of the supply tray. You will see Dark Blue Roped Pairs buried there. Again, verify your belt is empty. Tap one Dark Blue pair. These will occupy 2/5 slots. Send them to the top corners of the canvas. These are also small zones. The key here is isolation—do not mix these with other colors. If you pour Dark Blue while White is still active, you risk spilling Dark Blue onto the cow's back.
Step 8: Managing the Cyan Background Flood
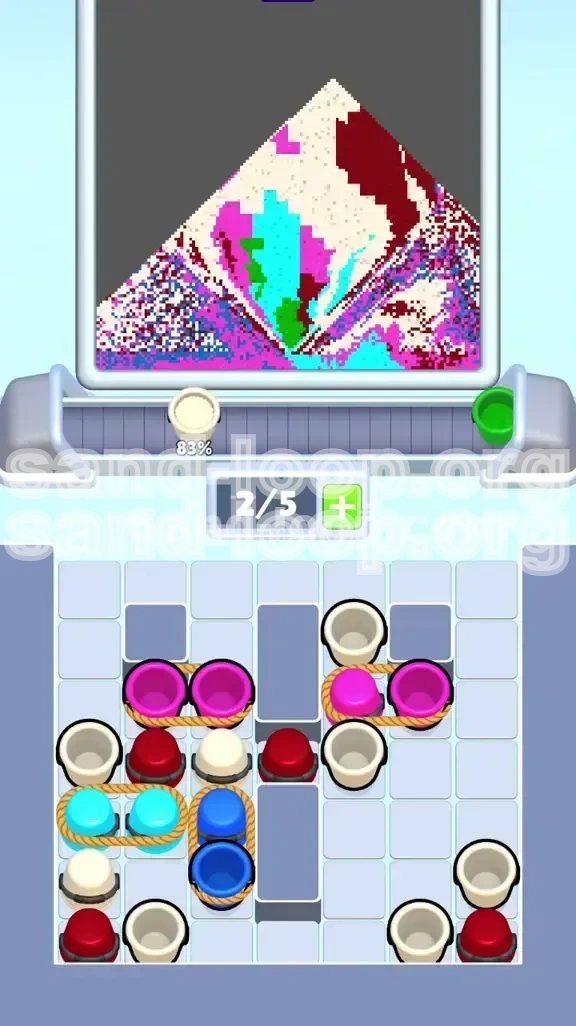
The Cyan Roped Pairs are located on the left and right flanks of the center grid. These are the most dangerous because the Cyan background is a huge area, meaning these cups will pour for a long time. You should only tap these when the cow (White, Dark Red, Pink) is 100% complete. Tap a Cyan pair (2/5 slots). Let them flood the background. Since the cow is already solid, the Cyan sand will flow around it. You can add the second Cyan pair while the first is pouring to maximize efficiency, pushing you to 4/5 slots safely.
Step 9: Final Color Cleanup
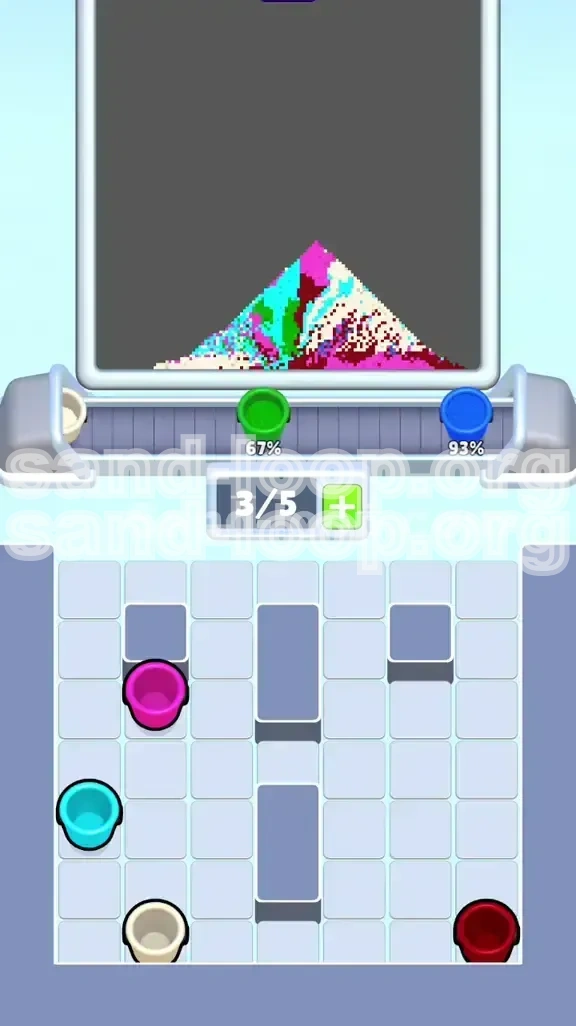
At this stage, the only remaining cups should be stragglers—singles that were hidden behind the pairs. You might have leftover White or Green singles. Tap these to top off any areas that look slightly under-filled. The belt should be moving freely now, and the image should be complete.
Step 10: The Final Flush
Do not stop tapping just because the image looks "done." Often, the game requires you to clear the *entire* supply tray to register a win. Check the tray for any remaining cups. If you have empty slots on your belt and empty space on the canvas, tap them. If the canvas is full but the tray has leftovers, keep the belt moving to clear the queue. The level ends only when the image is correct and the flow is managed.
Pro Tips, Common Mistakes, and Speed Run Strategies
To truly master Level 470, you need to understand the common failure points and how to optimize your movements for a speed run. This section covers the advanced nuance that separates a clear from a perfect clear.
Common Mistake: The "Full Belt" Panic
The most common error players make is treating the 5-slot limit as a target. They fill the belt to 5/5 and then try to figure out what to do. This leaves you with zero margin for error. If you tap a Roped Pair at 5/5 capacity, you lose instantly. Always keep one slot open. Operate at 4/5 capacity maximum. This "buffer slot" is your insurance against accidental double-taps.
Common Mistake: Ignoring the "Pour Speed"
Not all cups pour at the same speed. A cup filling a tiny pixel (like the Pink snout) will finish in 2 seconds. A cup filling the sky (Cyan) will take 20 seconds. If you tap a fast-pouring cup followed by a slow-pouring cup, the fast one will finish and leave the belt, suddenly dropping your slot count. This is good, but if you aren't ready for the next tap, you lose efficiency. Conversely, if you fill the belt with slow-pouring Cyan cups, you are "locked out" of tapping anything else for a long time. Plan your rhythm around the pour speed.
Speed Run Strategy: The "Chain Tap"
For a speed run, you must utilize the "Chain Tap" technique. This involves tapping the next cup the *instant* the previous cup starts pouring. Do not wait for the sand to finish. If you have a clear path (e.g., just Green and White singles on the perimeter), tap them in a rapid-fire sequence: Green, White, Dark Red, Green. This floods the belt to 4/5 instantly and maximizes your throughput.
Speed Run Strategy: Pre-Positioning
While the sand is pouring, use your downtime to hover your cursor (or finger) over the *next* target. If you are waiting for a Pink pair to finish, hover over the Dark Blue pair. This reduces the reaction time between the end of one pour and the start of the next. In Level 470, saving 0.5 seconds between every tap adds up to a significant time reduction.
Stuck Solution: The "Reset" Protocol
If you find yourself stuck with a full belt of colors you don't need (e.g., you have Cyan on the belt but the cow isn't finished), you are in a "Dead State." There is no way to reverse the flow. In this specific level, do not try to "fix" it by waiting. It is faster to intentionally fail or restart the level immediately. Resetting takes 2 seconds; trying to force a solution with the wrong colors usually takes 2 minutes and often fails anyway.
Advanced Tip: Audio Cues
Turn up the game volume. The sound of the sand pouring changes pitch when it is about to finish. Learn this audio cue. It allows you to keep your eyes on the supply tray (to plan your next move) rather than watching the canvas (to see if the pour is done). When you hear the pitch drop, immediately tap your next cup. This "eyes-up" technique is essential for breaking your personal best time.