
Level 83
HARDHow to solve Sand Loop level 83? Get instant solution for Sand Loop 83 with our step by step solution & video walkthrough. Sand Loop 83 tips and guide.
Play Sand Loop Now
Experience the puzzle challenge firsthand
Game Screenshots
Sand Loop Level Guides
Level 83 Walkthrough: The Yellow Pixel Chick
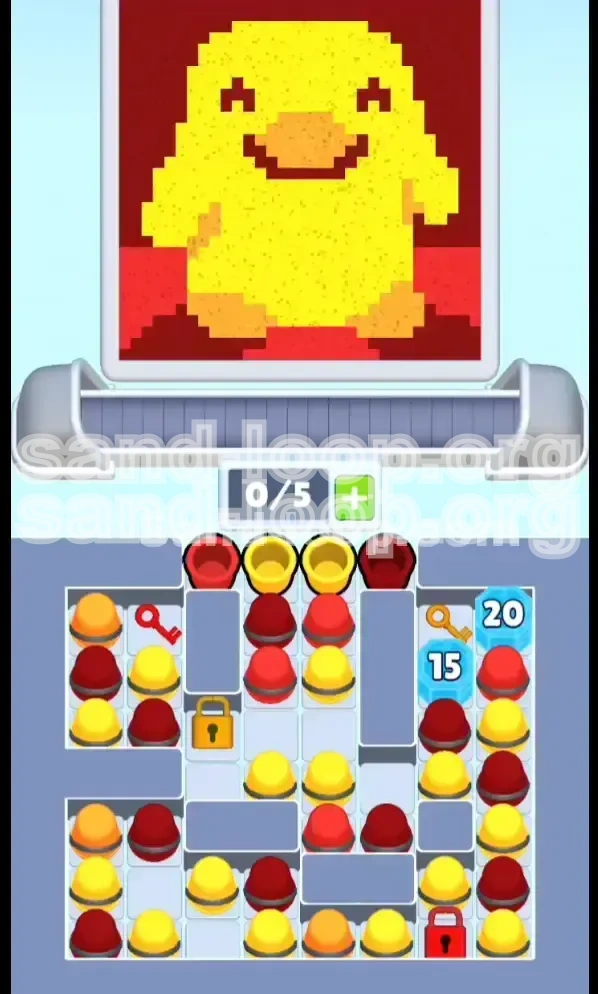
Welcome to Level 83 of Sand Loop, commonly known as the "Yellow Pixel Chick" stage. This level represents a significant difficulty spike, acting as a logic gate that separates casual players from strategy masters. The visual design is deceptively simple—a massive, chubby yellow chick reminiscent of 8-bit retro gaming—but the underlying mechanics are unforgiving. You are dealing with a "Zero-Capacity Start" (0/5 slots available initially), restricted board movement due to dual locks, and the daunting presence of high-health Blue Ice Blocks that guard the most critical sections of the board. This guide is designed to take you from a frozen deadlock to a fluid victory.
The Core Challenge: Space Management
The primary antagonist of this level is not the time limit, but space. You begin with a full queue of 5/5 slots (or limited movement options), meaning every move must be pre-calculated. Unlike previous levels where you could afford to hold a cup for later, Level 83 requires immediate turnover. The layout creates a funnel effect; if you clog the top-left, the entire right side of the board becomes inaccessible. You must treat every slot in your queue as a precious resource.
The Ice Block Mechanics
On the right side of the board, you will notice two Blue Ice Blocks marked with "15" and "20". These are not just obstacles; they are timers. The numbers represent the "Health" of the block. To break them, you do not attack them directly. Instead, you must clear cups that are adjacent to these blocks. Every successful clear of a neighbor cup deals 1 damage to the ice. Ignoring these blocks for too long will result in a deadlock, as they prevent access to the Gold Key needed to unlock the center of the board.
The Dual-Lock System
This level features a Red Lock in the bottom-right and a Gold Lock in the center-left. This creates a dependency loop. You cannot reach the Gold Lock until you clear the right side, and you cannot effectively clear the right side until you unlock the Red Lock to free up space. The sequence in which you tackle these locks determines 90% of your success rate. Picking the wrong lock first will lead to an inevitable "Game Over" due to running out of moves.
Visual Target Analysis
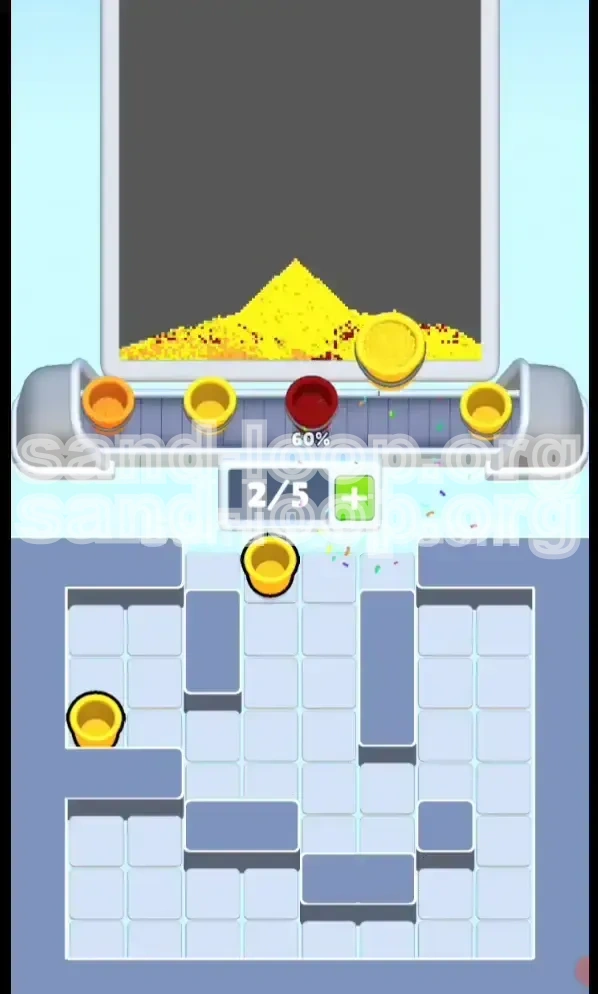
Your goal is to paint a vibrant Yellow Chick. However, the pixel art requires precision. The Beak and Feet are not just yellow; they require a specific Orange shade. The Background is a deep Maroon/Dark Red. The biggest visual risk is "Bleeding"—where the high-volume Yellow sand flows into the tiny Eye sockets (single pixels). If you overfill the yellow, you lose the definition of the face, requiring a costly restart. Accuracy is more valuable than speed here.
Strategic Overview
To beat Level 83, you must adopt a "Top-Left to Bottom-Right" sweeping strategy. You will start by ignoring the cute chick's face and focusing entirely on resource generation (clearing cups) to break the ice. The level is divided into three phases: The Key Rush (unlocking space), The Ice Grind (breaking the barriers), and The Paint Job (filling the art). Follow this walkthrough to navigate each phase safely.
Level Objectives and Victory Conditions
Before you make your first move, understand exactly what "beating" this level entails. It is not just about filling the canvas; it is about efficient board management.
Primary Objective: Clear the Board
The victory condition is reaching a state where no cups remain on the board. This sounds obvious, but in Level 83, you cannot rely on simply filling the picture. You must actively clear cups to damage the Ice Blocks. If you focus only on pouring sand, you will leave the Ice Blocks intact, trapping essential keys. Your mindset must shift from "Painter" to "Strategist" for the first 50% of the level.
Unlock the Red Zone First
The Red Lock is located in the bottom-right corner. This is your first major milestone. Unlocking this area is critical because it houses the dispensers for the Dark Red background sand and, more importantly, provides the "breathing room" needed to shuffle cups around. Without this space, your queue will fill up, and you will have no moves left.
Shatter the Blue Ice
The Blue Ice Blocks (15 HP and 20 HP) act as the gatekeepers to the Gold Key. You cannot complete the level without acquiring the Gold Key, which is trapped behind the '15 HP' block. Therefore, a secondary objective is to generate at least 15 successful clears adjacent to the upper-right ice block. This is a numbers game; the faster you cycle cups, the faster the ice breaks.
Precision Coloring
You must achieve a 95%+ fill accuracy to ensure the background doesn't bleed into the character. Specifically, you must separate the Yellow Body (Main dispenser) from the Orange Beak/Feet (Middle/Specific logic) and the Dark Red Background (Far Right dispenser). Mixing these up—specifically pouring Dark Red into the Yellow areas—will create a muddy image that is hard to fix without restarting.
Prevent Deadlocks
The fail state of Level 83 is the "Deadlock." This occurs when your queue is full (5/5), and every cup on the board is the wrong color for the available dispensers. To avoid this, you must constantly prioritize clearing cups over filling the picture, especially in the early game. Keeping your queue fluid is the difference between a win and a loss.
Master the 0/5 Start
You start with zero margin for error. The initial configuration of cups is designed to be tricky. Your first objective is to create at least one empty slot in your queue. This "Open Slot" is your lifeline. It allows you to swap cups or grab a key that drops unexpectedly. Never let your queue stay at 5/5 capacity for more than 2-3 moves.
Step-by-Step Walkthrough: Phase 1 (The Key Rush)
The opening moves are the most critical. We will use a "Top-Left Aggression" strategy to open the board.
Step 1: Scan the Top-Left Sector
As soon as the level loads, ignore the bottom half entirely. Focus your eyes on the top-left cluster of cups. You are looking for the Red Key. It is usually buried under a stack of Yellow and Red cups. Do not touch the right side of the board yet; it is blocked by ice and will only waste your time.
Step 2: Process the Yellow Stream
Identify the Yellow dispenser (typically the top or middle funnel). Begin sending Yellow cups from the top-left stack into this dispenser immediately. Your goal here is twofold: you are filling the chick's body, but more importantly, you are clearing space to reach the Red Key. Tip: If you have a choice between a Yellow cup and a Red cup, prioritize the one that uncovers the Key first.
Step 3: Isolate the Red Key
As you clear the Yellow cups, the Red Key will become exposed. However, you might not have a Red dispenser available yet, or your queue might be full. If the key drops to the bottom of the stack, use a strategic "swap" if you have an open slot. If your queue is full, you must clear a cup immediately to make room for the key. Warning: Do not accidentally send the Red Key to a dispenser; treat it as a unique item.
Step 4: Unlock the Bottom-Right
Once the Red Key is in your possession (or selectable), tap it to unlock the Red Lock in the bottom-right corner. You will hear a distinct unlock sound. This is the turning point of the level. By unlocking this zone, you have effectively doubled your playable area and accessed the Dark Red sand needed for the background corners.
Step 5: Assess the Queue
After unlocking the Red zone, pause for a moment. Check your queue capacity. If you are at 4/5 or 5/5, you are in danger. Use the newly accessible bottom-right area to dump a Dark Red cup if necessary. You want to enter Phase 2 with at least 2 open slots in your queue to handle the incoming complexity of the Ice Blocks.
Step-by-Step Walkthrough: Phase 2 (The Ice Grind)
With the Red Lock gone, we focus our attention to the right. The Blue Ice Blocks are the only thing standing between you and the Gold Key.
Step 6: Locate the Ice Blocks
Look at the top-right and middle-right sections of the board. You will see the Blue Ice Blocks. The top one usually has 15 HP, and the bottom one has 20 HP. The Gold Key is trapped above or beside the top block (15 HP). You need to break the top block to get the key.
Step 7: The "Neighbor" Strategy
You cannot damage the ice directly. You must clear cups that are physically touching the ice blocks. Look for cups directly adjacent to the blue blocks. These are your targets. It doesn't matter if these cups are Yellow or Red; clearing them is the priority. Every clear counts as 1 damage point.
Step 8: Cycle Cups Aggressively
This phase is a grind. You need to clear 15 cups adjacent to the top block. Don't worry about perfect painting right now; just cycle cups. If a cup is near the ice and matches a dispenser, clear it. If it doesn't match, see if you can swap it to a position where it can be cleared. Speed is key here.
Step 9: Monitor the Health Counter
Keep a mental count or watch the numbers on the ice blocks. As you approach 0 HP on the top block, get ready. The moment the block shatters, the layout of the board will shift. Cups will settle, and the Gold Key will drop into play.
Step 10: Secure the Gold Key
Once the top Ice Block shatters, the Gold Key will appear. It often falls into the middle of the board. Because you created open slots in Step 5, you should be able to grab it immediately. Do not dally; grab the Gold Key the second it is selectable.
Step 11: Unlock the Center
Take the Gold Key to the Gold Lock located in the center-left section of the board. Unlocking this connects the left and right halves of the board. This is crucial for preventing deadlocks later, as it allows cups to flow freely from the spawn point to the right-side dispensers.
Color Order and Processing Logic
Now that the board is open (both locks are gone), we can focus on the art. However, the order in which you process colors is vital to avoid ruining the pixel art.
The "Yellow River" Strategy
Yellow is your volume color. The chick's body is massive. You should set up a "flow" where you are constantly processing Yellow cups through the main (top) dispenser. This should be your default action. If you don't have a specific strategic move to make (like clearing a block), default to clearing Yellow cups.
The Precision of the Beak (Orange)
The Orange-banded cups are tricky. There is no specific "Orange" dispenser. In Sand Loop logic, these cups usually act as "Secondary" color cups. For Level 83, send the Orange-banded cups to the Middle Dispenser (often associated with Yellow or a mix). Crucial: Do not send these to the Dark Red (Far Right) dispenser. If you mix Dark Red and Orange, the beak will look muddy and undefined.
The Background (Dark Red)
The Dark Red cups are usually heavy and sit at the bottom of stacks. You should process these last or when you have a lull in the action. Send these to the Far Right Dispenser. This dispenser is isolated specifically to prevent the dark color from bleeding into the bright yellow body.
Protecting the Eyes
The eyes are the danger zone. They are single pixels or tiny slots. When you are pouring Yellow for the body, stop just before the meter hits 100% if the flow is near the eyes. It is better to underfill slightly and tap again than to overfill and have yellow sand bleed into the white/black eye sockets. If the eyes get contaminated, the chick looks "cross-eyed" or sleepy.
The Feet Logic
Like the beak, the feet require the Orange-banded cups. Since the feet are at the bottom of the composition, gravity works in your favor here. You can be slightly more aggressive with pouring these, but ensure you are using the correct sand (via the Middle Dispenser logic). Avoid the temptation to use leftover Red sand here; it must be the specific Orange/Yellow mix.
Clean Up Sweep
Once the main colors are down, you will likely have a few random cups left. These are usually "stragglers"—Yellow or Red cups that were buried under the Ice Blocks. With the board fully unlocked, simply sweep these up. Send them to their respective dispensers to finish the level.
Key Tips, Common Mistakes, and Stuck Solutions
Even with a strategy, things can go wrong. Here is how to handle the specific pitfalls of Level 83.
Common Mistake: Ignoring the Queue
Many players stare at the picture and forget their queue. Suddenly, they realize they have 5 cups and none of them match the open dispensers. Solution: Always glance at your queue (the cups waiting to be played). If you have 4/5 cups, prioritize a move that clears a cup, rather than a move that looks pretty but fills up your last slot.
Common Mistake: Dark Red Contamination
Accidentally sending a Dark Red cup into the Yellow stream creates a brownish smudge that ruins the vibrant look of the chick. Solution: Check the band on the cup twice before sending it. If it has a Dark Red band, physically drag your finger to the far right of the screen to ensure it goes to the correct dispenser, away from the yellow body.
Stuck Solution: The "Soft Lock"
If you are stuck with no moves but the game isn't over (a Soft Lock), you have likely missed a cup. Zoom in on the edges of the screen, specifically near where the Ice Blocks used to be. There is often a single cup squeezed in a crevice that you missed. Clearing that one cup can trigger a chain reaction that frees up your board.
Stuck Solution: Ice Block Won't Break
If you are clearing cups next to the ice but the number isn't going down, you aren't targeting the right cups. The cup must be immediately adjacent (touching) the ice block. Diagonal cups often don't count. Rearrange your cups to ensure a direct hit on the ice block's side to maximize damage efficiency.
Key Tip: Use the "Pause" Tactically
Sand Loop allows you to pause. Use this! After a big Ice Block shatters, pause the game. The cups will have settled in new positions. Take 10 seconds to plan your next 3 moves. This prevents the panic-clicking that leads to sending the wrong cup to the wrong dispenser.
Key Tip: Don't Force the Art
If the background isn't perfect 100% filled, don't restart immediately. Sometimes, getting a "Perfect" score is less important than simply beating the level. If the Dark Red corners are 90% filled but you are out of moves, the level will likely still let you pass with a 1-star or 2-star rating. Focus on completion first, perfection second.
Speed Run and Optimization Tips
Once you have beaten the level, you might want to improve your time or score. Here is how the pros do it.
Optimization: Pre-Loading
While the Red Key is dropping (animation time), you can already be selecting the next cup you want to clear. Don't wait for the animation to finish before looking for your next target. Constant activity shaves seconds off your time.
Optimization: Ice Breaking Combos
Look for opportunities where clearing one cup damages both the top and bottom ice blocks (if they are stacked vertically) or clears a cup and sets up a Key unlock simultaneously. Efficiency in Phase 2 is the biggest time saver.
Shortcut: The Yellow Flood
If you are confident in your aim, you can skip the "careful" pouring for the body. Once the beak and eyes are done, you can aggressively flood the remaining area with Yellow sand. The game's physics usually handle the fill detection for large areas quickly. This is risky but much faster.
Speed Run Strategy: Ignore the Background
For a pure speed run (just finishing, regardless of score), you can completely ignore the Dark Red background cups. Focus 100% on the Yellow Chick and the Keys. The background fill adds significant time to the clock with minimal strategic value for unlocking the board. You can leave the background empty if your only goal is to reach the next level.
Advanced Technique: The "Swap and Drop"
Instead of sending a cup to the dispenser immediately, swap it with a cup that is already in the correct dispenser slot. This saves you the drag time. This is an advanced mouse/touch maneuver that can increase your actions-per-minute (APM) significantly.
Mental Preparation
Level 83 is mentally taxing. Before starting, take a breath. The "Sand Loop" is real—you might die a few times learning the pattern. Stay calm, focus on the slots, not the sand, and you will crack the code of the Yellow Chick.