
Level 84
HARDHow to solve Sand Loop level 84? Get instant solution for Sand Loop 84 with our step by step solution & video walkthrough. Sand Loop 84 tips and guide.
Play Sand Loop Now
Experience the puzzle challenge firsthand
Game Screenshots
Sand Loop Level Guides
Sand Loop Level 84 Walkthrough: The Concentric Heart Logic Puzzle
Welcome to the definitive guide for Sand Loop Level 84. This stage represents a significant jump in difficulty, moving from simple color matching to complex logic puzzles involving keys and locks. In this level, you are tasked with painting a beautiful, multi-layered heart design. However, the game buries the essential tools you need deep inside the supply stacks, forcing you to solve a "Key Relay" puzzle while simultaneously managing the paint flow. If you try to play this stage purely on reaction speed, you will likely fail. This guide breaks down every mechanic, provides the exact color order, and ensures you can secure that 100% completion rating.
Level Overview & The "Key Relay" Mechanic
Unlike standard levels where you can simply pick colors from the tray as they appear, Level 84 locks away critical colors behind three distinct gates. This is the core challenge. You cannot access the outer layers of the heart until you have excavated the specific keys hidden in the main tower. The level is a test of prioritization: you must ignore easy, immediate points to dig for the keys that unlock the late-game resources.
Visual Breakdown of the Target
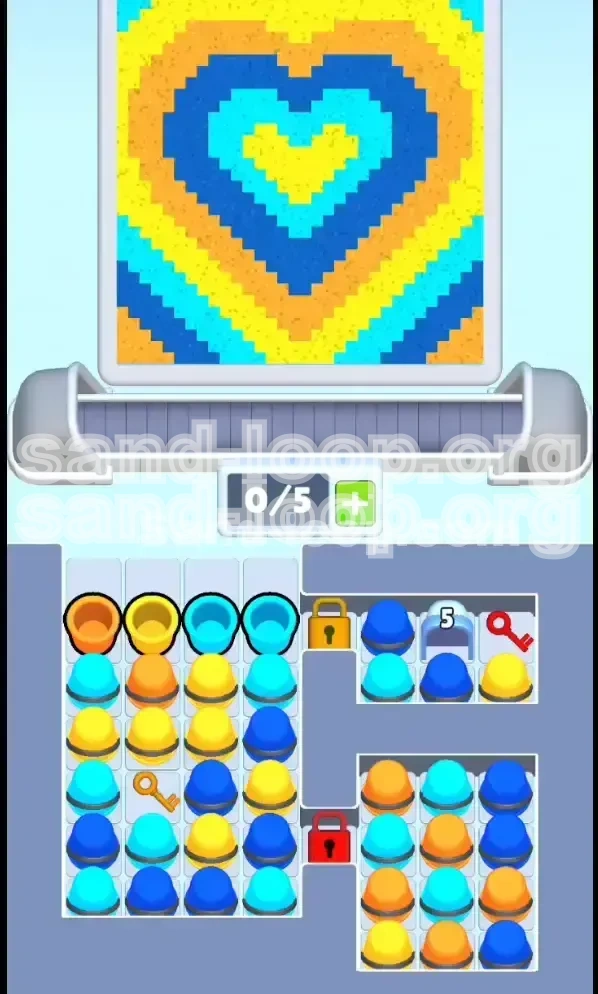
Your goal is a concentric heart. Understanding the layering is vital for predicting the next color needed. The structure is built from the center outwards:
- Layer 1 (The Core): A small, solid Bright Yellow square in the absolute center.
- Layer 2 (Inner Glow): A Cyan (Light Blue) ring surrounding the yellow core.
- Layer 3 (The Body): A thick ring of Dark Blue forming the main heart shape.
- Layer 4 (Background): The background consists of diagonal stripes alternating between Orange, Yellow, and Cyan.
Primary Obstacles: The "Buried" Strategy
The level design is deceptive. The main tower on the left contains the Gold Key, but it is buried under useless "filler" colors. Meanwhile, the side chambers hold massive reserves of Orange and Dark Blue that you cannot touch yet. The primary obstacle is impatience. If you waste your conveyor belt slots (the 5 available slots at the bottom) on colors that aren't immediately needed, you will block yourself from digging out the key, causing a soft lock.
Success Metrics
To achieve the highest rating (3 Stars), you must maintain a combo multiplier. This means avoiding "wrong color" penalties. In Level 84, a single wrong color dumped into the Dark Blue section can drop your accuracy below 90%, forcing a restart. Precision is more valuable than speed here.
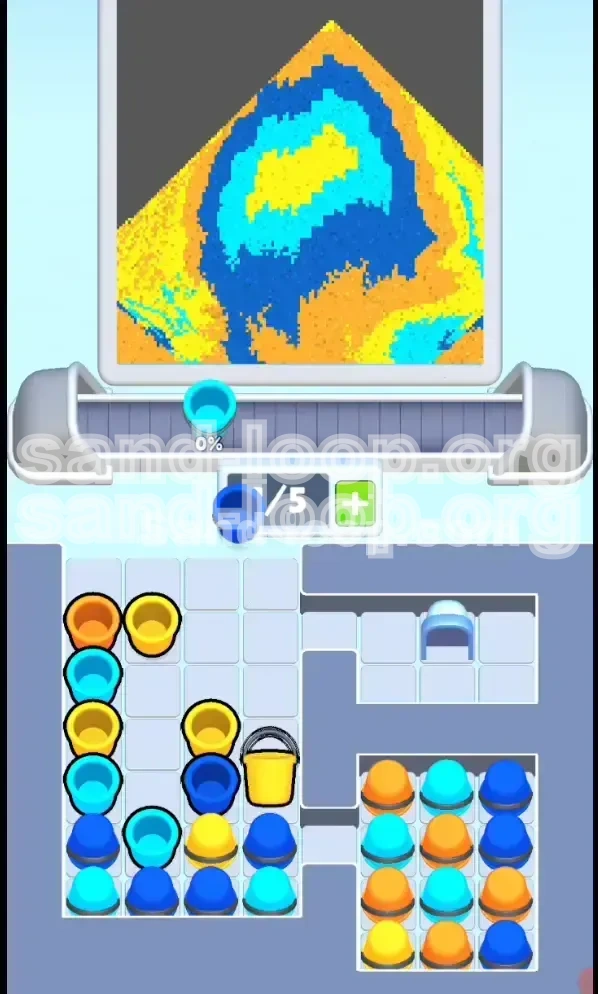
Step-by-Step Instructions: The Excavation Phase
The first phase of the level is purely logistical. You cannot paint the background yet. You must focus entirely on the left-most stack of cups (the Main Tower) to liberate the Gold Key.
Step 1: Ignore the Cyan Temptation
When the level starts, you will see columns 3 and 4 filled with Cyan cups. Your inner instinct will be to grab them because the canvas has a Cyan ring. Resist this urge. The Cyan cups in the main tower are blockers. The actual Cyan you need for the second layer is accessible later. If you fill your conveyor belt with Cyan now, you will have no space to dig for the key.
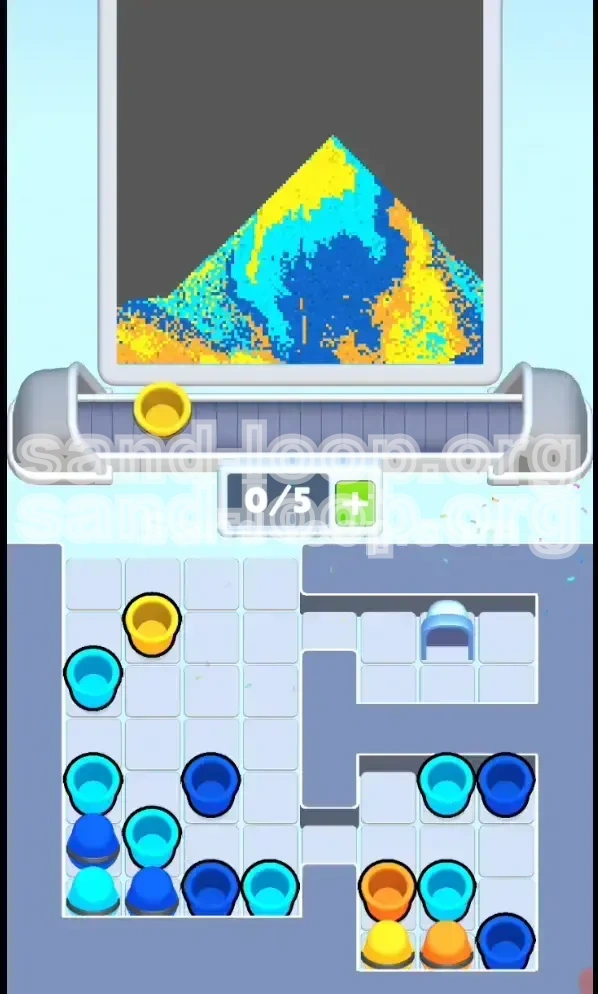
Step 2: The Column 2 Dig
Focus your attention exclusively on Column 2 of the main stack. This is the "Key Column."
- Move 1: You may need to clear the top-most cup (usually Orange) to prevent a belt jam, but send it to the background immediately if the canvas allows.
- Move 2: Locate the Bright Yellow cup sitting atop the obstruction layers. This corresponds to the center of the heart. Pour this into the center core.
- Move 3: Continue tapping Column 2. You are digging down. You will encounter a mix of colors that act as "shielding" for the key.
Step 3: Retrieving the Gold Key
Approximately 3 rows down in Column 2, you will hit the Gold Key. This is the most critical moment of the level.
- As soon as the Gold Key is the top cup of that column, tap it.
- The Gold Key will fly to the top-right chamber and unlock the first gate.
- Note: Do not worry if your conveyor belt is partially full. Clearing space for the key is the priority.
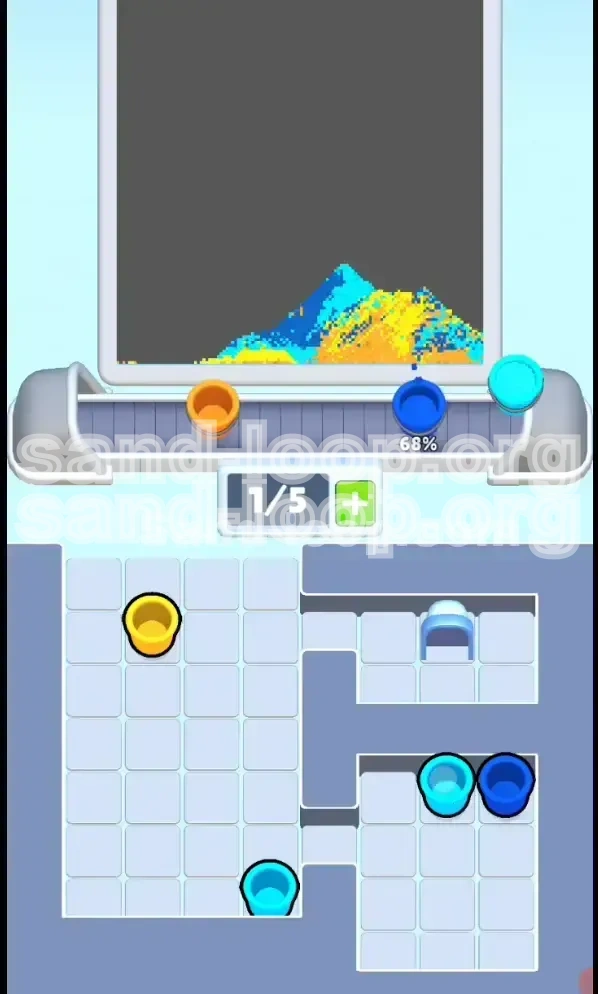
Step 4: Managing the "5-Gate" Count
Once the Gold Key activates, the top-right chamber opens. However, you are not free yet. A small ice archway with the number "5" blocks the actual resource (The Red Key). You must smash this gate by successfully pouring 5 valid cups.
- At this stage, the canvas is likely transitioning from the Yellow Core to the Cyan Ring.
- Use the Cyan cups from the main tower (which you wisely avoided or are now clearing) to feed this count.
- Warning: Do not pour 5 cups of the same color if the canvas doesn't call for it. Match the canvas pattern. The gate tracks "valid pours," not just taps. Ensure every drop hits the correct color zone.
Color Order and Layering Logic
Understanding the exact sequence of colors helps you pre-load your conveyor belt. In Sand Loop, pre-loading is the secret to speedrunning. The colors do not appear randomly; they follow the geometric layers of the heart.
Phase 1: The Core (Yellow)
Requirement: 1-2 Yellow Cups.
Strategy: This is the easiest part. The game usually spawns a Yellow cup immediately at the start or right on top of the key column. Do not waste these.
Phase 2: The Inner Ring (Cyan)
Requirement: 10-15 Cyan Cups.
Strategy: This is your first bulk task. The Cyan cups are plentiful in the main stack. Crucial Tip: Ensure you have finished the Yellow core completely before switching to Cyan. If a single pixel of Yellow remains unpainted and you pour Cyan, you create a "dirty" pixel that lowers your score.
Phase 3: The Middle Ring (Dark Blue)
Requirement: 20-25 Dark Blue Cups.
Strategy: This is the "Danger Zone." Many players fail here. The Dark Blue cups are locked in the bottom-right chamber (Red Key). You must unlock the Red Key (see below) before you can seriously tackle this section. Do not rely on the rare Dark Blue cups in the main stack; save those for emergencies.
Phase 4: The Diagonal Stripes (The Background)
Requirement: Alternating Orange, Yellow, Cyan.
Strategy: This requires active management. The pattern is diagonal. You cannot just load 5 Orange cups. You must load 1 Orange, 1 Yellow, 1 Cyan, or similar variations, to match the diagonal sweep of the brush.
Unlocking the Red Key Phase
After you break the "5-Gate," grab the Red Key immediately. This unlocks the bottom-right chamber. This is your armory. Inside, you will find the heavy reserves of Dark Blue and Orange needed to finish the level. Once this opens, the game shifts from "Scarcity" to "Flow Management."
Key Tips for Precision Play
Level 84 is not just about solving the puzzle; it's about painting cleanly. These tips focus on the mechanics of the sand simulation to ensure you don't lose percentage points.
Conveyor Belt Management (The 0/5 Rule)
Your belt has 5 slots. This is your buffer.
- Early Game: Keep 2 slots open. You need space to catch the cups you are digging out to find the Gold Key. If all 5 slots are full, you cannot dig, and the game jams.
- Late Game: Fill all 5 slots. Once the Red Key unlocks the bottom chamber, you have access to infinite resources. Keeping the belt full minimizes the time spent waiting for cups to slide in.
The "Tap" vs. "Hold" Technique
When digging for the key in Column 2, use a rapid tap method rather than holding. Tapping allows you to inspect the color of the next cup coming up. If you hold, you might accidentally pull a useless color into your active slot when you needed a specific color to clear a jam.
Utilizing the Pause Function
Sand Loop allows you to pause the brush (usually by tapping the canvas or a specific pause button depending on your version). Use this during the Outer Stripes phase. The background stripes change color every few pixels. If you are unsure if the next stripe is Orange or Yellow, pause the canvas, check the pattern, load the correct cup, and unpause. This prevents 90% of the errors in this level.
Clean Transitions
The most common way to lose points in Level 84 is at the border between the Cyan Ring and the Dark Blue Ring.
- The brush often paints "partial" pixels where the rings meet.
- If you have a Cyan cup loaded and the brush touches a Dark Blue pixel, it contaminates the cup.
- Tip: Always empty your cup completely before the brush moves to the next ring. It is better to have a short gap (dry brush) than a contaminated color.
Common Mistakes to Avoid
Players tend to fail Level 84 for the same three reasons. Analyzing these errors will help you self-correct during the run.
Mistake 1: Premature Background Painting
You see Orange cups available in the main stack early on. You start pouring them on the background edges. Why this fails: You are using up valuable conveyor belt space on the background (which is low priority) while the timer for the main heart is ticking. The background has no time limit, but the keys do. Focus on the keys first.
Mistake 2: Ignoring the "5" Count
Some players unlock the Gold Key, see the "5-Gate," and then keep digging in the main stack, forgetting to feed the gate. Why this fails: The game stops giving you new keys until you break that gate. If you don't actively smash the "5-Gate," you run out of moves in the main tower and get soft-locked with a half-empty canvas.
Mistake 3: Color Contamination in the Dark Blue Zone
The Dark Blue ring is the largest area. Players often try to finish it in one go. However, the main stack usually has stray Cyan or Yellow cups mixed in. If you accidentally pour a Cyan cup into the Dark Blue ring, it creates a very noticeable blemish that is hard to fix later. Correction: If you pick the wrong color, deliberately dump it onto a finished, safe area (like the completed Yellow center) or wait for a diagonal stripe to appear that matches that color.
Mistake 4: Panic Filling
When the belt moves fast, players grab the first cup they see. Why this fails: Level 84 has "Trap Cups"—cups that are the right color family but wrong shade (e.g., pouring a Dark Blue cup when the canvas needs a Light Blue cup, though Level 84 mostly distinguishes by hue, the trap is usually pouring background colors into the foreground). Always look at the rim color of the cup, not just the liquid body.
Speed Run Tips and Shortcuts
Once you have mastered the logic, you can aim for a sub-60 second clear. This requires bypassing the standard safety checks.
Pre-Loading the "Stripes" Sequence
The background stripes follow a strict diagonal pattern: Orange -> Yellow -> Cyan -> Orange.
- While you are still painting the Dark Blue heart (the foreground), you can pre-load your conveyor belt with the background colors.
- Load your belt with 2 Orange, 1 Yellow, 1 Cyan, 1 Orange (in that order).
- As soon as the heart finishes, immediately start pouring the background. This shaves off about 10 seconds of "thinking time."
Skipping the "Clean Up" Phase
Usually, players carefully fill in the awkward corners of the heart. If you have a full belt of the correct color, you can "swipe" across the area rapidly. The game's physics engine tolerates slight over-spilling if the underlying color is correct. This allows you to paint the Dark Blue ring in 3 broad strokes instead of 10 small ones.
The Gate Smash Shortcut
When breaking the "5-Gate," you don't need to wait for the cups to hit the canvas perfectly. As long as the cup leaves your hand and the color is technically on the canvas (even if it splashes over a line), it counts toward the gate number. You can spam-tap the Cyan cups rapidly to break the gate in 1 second rather than waiting for the pixel-perfect fill.
Optimizing Key Retrieval
The Gold Key in Column 2 is often covered by 3 layers of cups. Instead of waiting for the cup to settle on the belt before tapping the next, you can "chain tap." Tap the cup, and immediately tap the column again. The game registers the "dig" while the previous cup is still sliding to the paint gun. This mechanic allows you to retrieve the Gold Key roughly 30% faster.